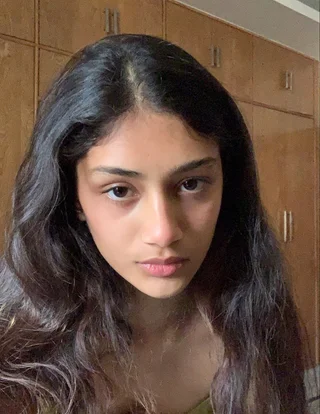
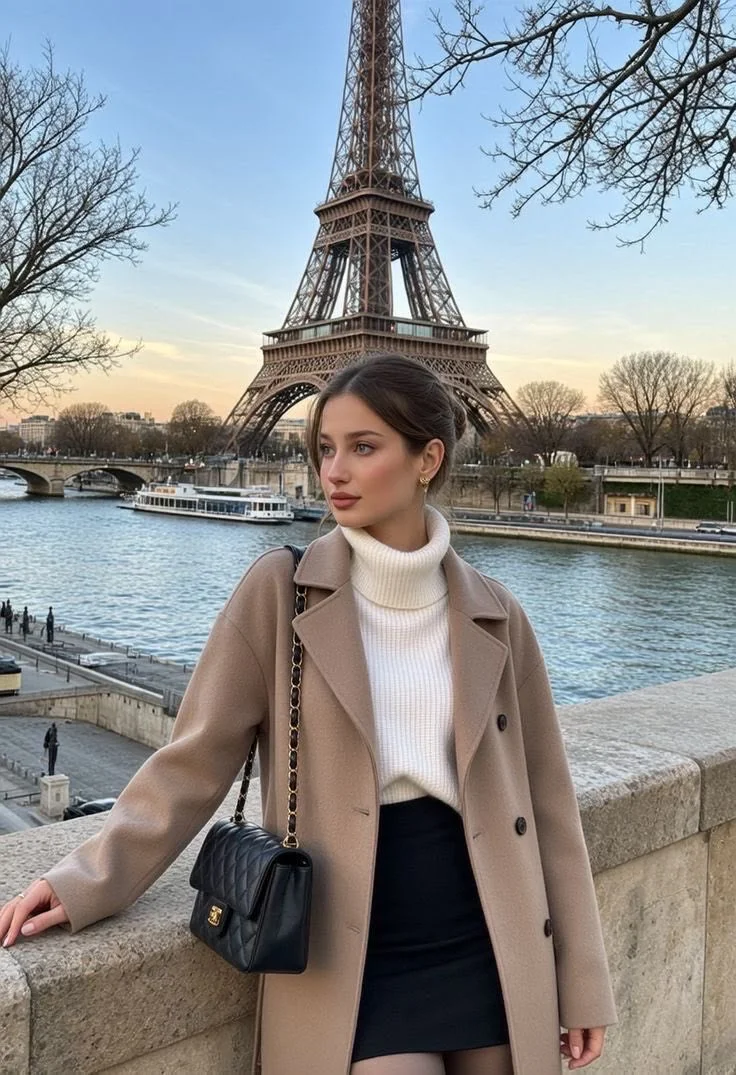
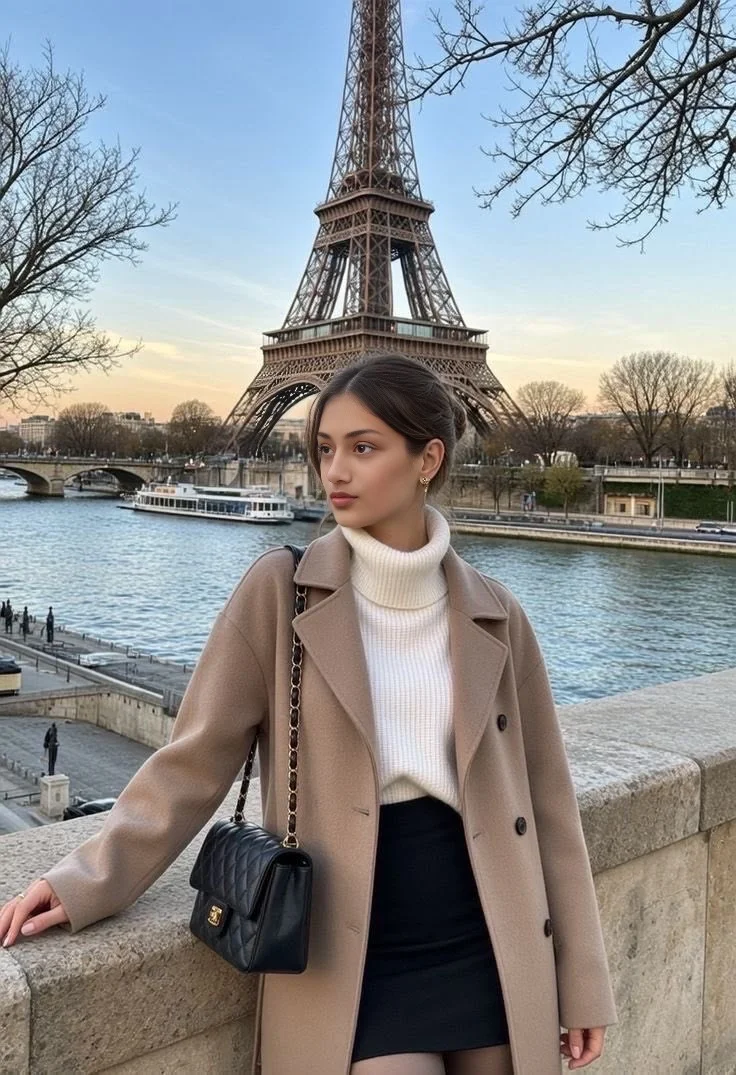
To swap a face from one photo to another, upload the face you want to use as the source and the picture you want to appear in as the target. Create the swap, inspect the result, and download it. You do not need Photoshop, manual cutouts, or a text prompt.
This guide covers SwapThisFace’s single-face photo editor. It does not cover group-photo swaps, video, GIFs, or live camera effects. The illustration above shows an existing homepage example; the instructions below describe the current editor rather than a newly measured quality test.
How a photo face swap works: source versus target
A photo face swap uses two different inputs. The source is the person whose facial identity you want in the finished picture. The target is the photograph you want to edit. Choosing the right target matters because it establishes the scene, framing, clothing, and head position that the swap starts from.
Imagine you have a clear selfie and a portrait taken beside the Eiffel Tower. To put your face in the Paris picture, upload the selfie under “Your face” and the Paris portrait under “Your new look.” Reversing the uploads asks for a different edit: the face from the Paris portrait would be used in the selfie composition.
The output is an AI-edited image, not simply a rectangular piece of one photo pasted over another. That is why you should inspect features, edges, and the surrounding scene after processing. A successful upload means the files were accepted; it does not mean every facial detail will be reproduced exactly.
Face swap, face morph, or background replacement?
These edits solve different problems. A face swap puts one person’s face into an existing photo. A face morph blends facial features into a combined appearance. A background replacement changes the setting around a subject. If your goal is a new outfit or location, pick a target with that composition before swapping. The two-photo editor does not provide a separate background or clothing control.
How to choose photos for a more natural face swap
Match the direction of the face first
Compare the head turn and tilt in both photos. A front-facing selfie is a useful starting point for a front-facing target. For a target looking slightly to one side, try a source looking in a similar direction. A full side profile paired with a straight-on source leaves more of the appearance to be inferred. If you have several selfies, choose by pose before choosing by how flattering the selfie looks.
Look for detail in the face, not just a large file
Open each original and look at the eyes, nose, and mouth. Can you distinguish the edges clearly, or do they dissolve into compression blocks? A large landscape photo with a tiny person may contain less useful facial detail than a smaller close-up portrait. Screenshots, images forwarded repeatedly through messaging apps, and aggressive beauty filters can remove detail before you begin.
Use the original camera image when possible. Cropping away unnecessary space can help you assess the face, but cropping cannot recover missing detail. Avoid stretching a small face to make it appear high resolution. If the eyes are already blurred in the source, a different source photo is a better starting point than a bigger export of the same image.
Compare lighting, expression, and obstructions
Start with evenly lit photos where facial features are easy to see. A source taken in soft daylight may be easier to pair with a similarly lit target than one taken under strong colored lighting. Look for deep shadows across one eye, an overexposed forehead, or a bright rim around the face. These are useful clues when a result looks disconnected from the scene.
Expression matters too. If a closed-mouth source produces an odd-looking smile in an open-mouth target, try a source with a closer expression or a target with a simpler expression. Teeth, glasses, hair crossing the eyes, and hands in front of the mouth create boundaries worth checking carefully. There is no single photo choice that guarantees a perfect swap; the goal is to remove avoidable mismatches.
A practical photo-pair checklist
Before uploading, check five things: one clearly visible face in each image; similar head direction; enough facial detail to inspect; limited obstruction across the eyes and mouth; and supported files under the upload limit. If you can only improve one thing, replace the image with the least visible face. Keep a second source portrait ready so you can compare one change at a time.
Before you start: formats, file size, and permissions
Use a source selfie or portrait with one clearly visible face. Start with a sharp original, even lighting, and visible eyes, nose, and mouth. Avoid sunglasses, heavy filters, and hands or hair covering the face.
Choose a target with one visible face and a head angle close to your source. The target is where you choose the outfit, pose, and setting. A tiny or distant target face gives the model less detail to work with. Enlarging a blurred image does not restore that detail.
Both files must be JPG, PNG, or WebP and no larger than 10 MB each. If your phone provides a HEIC image, export a copy in a supported format before uploading. Keep the original photos so you can try a different pair without losing them.
Use only photos you have permission to edit, including permission from the people shown. Review the photo-processing and retention details before submitting. The live editor asks you to confirm that you are at least 18 and agree to the stated processing.
1. Open the editor and add your source face
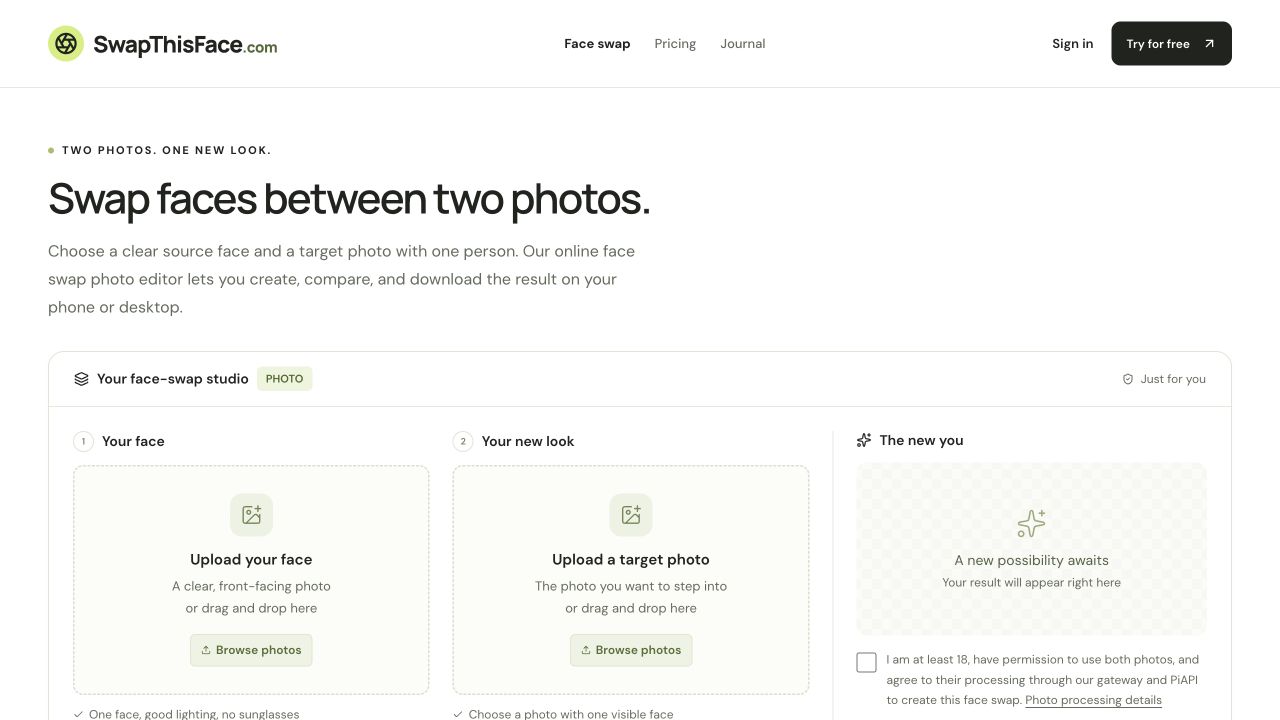
Open the photo face swap editor in your desktop or mobile browser. Under “Your face,” select “Upload your face” or “Browse photos,” then choose the portrait that supplies the face.
Check the preview before proceeding. If the selected image is the travel scene or costume picture you wanted to appear in, you have chosen the target for the source slot. Replace it with your source portrait.
2. Upload the target picture
Under “Your new look,” choose “Upload a target photo.” Select the scene you want to appear in. For example, in the illustration above the close-up portrait is the source and the Eiffel Tower portrait is the target.
Check that the target has one visible face. Choose a different image if the face is too small, turned far away, or covered. Matching angles and lighting can improve the starting point, but they do not guarantee a particular result.
3. Review the processing notice and create the swap
Read the processing notice below the result panel. Confirm it only if it applies to you and your photos, then select “Swap my face.” If you change either photo, review and confirm the notice again. The button remains unavailable until the required inputs and confirmation are ready.
Keep the page open while the editor processes the images. The status message shows the current stage. Avoid starting another job just because the first one is still running. Processing time varies; this guide does not promise a fixed completion time.
The guest offer is one successful photo swap without an account. It is not unlimited free access or a subscription enrollment. For continued use, see the current plans and credit packs. A failed job releases the reserved credit or guest attempt.
4. Compare the result with your target
When the result appears, move the comparison slider to inspect the original target and the output. Check the eyes, mouth, skin tone, face edges, and hairline. Look at the rest of the scene too: review the output for unintended changes rather than assuming the pose or background is perfectly preserved.
A plausible face swap depends on both inputs and the processing model. If the editor labels an output “Preview,” treat it as a development preview rather than a completed production face swap.
5. Download the image you want to keep
Select “Download” beneath the completed comparison. On a phone, check your browser’s download location and use your device’s normal save or share controls. Open the saved file to confirm that you downloaded the output you intended.
Download results you want to keep rather than relying on permanent online storage. Originals expire after 24 hours; the published policy describes 24-hour guest results and 30-day account results. Review the current retention and deletion policy for details.
A repeatable way to improve a face swap that looks unnatural
Treat the first result as feedback about the photo pair. If the scene and pose are right but the face does not resemble the source closely enough, keep the target and try a clearer source with a closer angle. If several good source photos all struggle with the same target, change the target instead. This is more informative than replacing both photos after every attempt.
For example, suppose the Paris composition is what you want, but the mouth looks stretched. First compare the source and target expressions. Try a source with a similar smile while leaving the Paris target unchanged. If the face edge still looks wrong, check whether one photo is frontal and the other is strongly turned. Each attempt tests a specific mismatch; it is not a guarantee that the next output will be better.
Inspect at two sizes: normal viewing size for the overall impression, then a closer view for facial boundaries. Compare the eye direction, mouth shape, cheek edges, chin, hairline, and skin transition. Also check earrings, glasses, and nearby background details. Save only a result you are comfortable using, and make clear that it is edited when the context could otherwise mislead someone.
Photo face swap troubleshooting: symptoms and next steps
The wrong face or the wrong scene appears
Check the input order. “Your face” is the source identity; “Your new look” is the target composition. If you wanted the outfit and setting from the second photo, that photo belongs in the target slot. Re-uploading the same pair in the same order will not correct a source–target mix-up.
The face looks blurry even though the background is sharp
Look at the source face at its original size. A sharply detailed background does not prove the face itself is sharp. Try an original portrait with a larger visible face, then inspect whether the target face is also small or motion-blurred. Do not assume a higher-quality export setting will fix detail that was missing before the swap.
The skin tone or face edges do not fit the target
Compare lighting direction and color in the two inputs. Try a source without strong filters or colored light, and choose a target with less extreme shadows. Look for a mismatch in head rotation as well: a face that has to fit a very different angle can produce awkward boundaries. The editor does not offer manual masking or a skin-tone adjustment slider, so changing the inputs is the practical next step.
The upload is rejected or the button stays disabled
Check the displayed error first. Confirm that both files really are JPG, PNG, or WebP and each is no larger than 10 MB. A renamed HEIC file is still HEIC. Wait for both previews to load, then review the processing confirmation. If you replace an image, confirm the notice again. If the service reports that it is unavailable, repeated uploads will not resolve that service condition.
The result is ready but I cannot find the saved image
Use the result’s Download control, then check your browser’s downloads list or your device’s file manager. A browser download may be saved as a file rather than added directly to the photo library. Open it before leaving the workflow to confirm that it is the completed output. Avoid relying on a screenshot of the editor, which can include controls and reduce the usable image area.
Frequently asked questions about swapping faces in photos
How do I swap faces between two photos online?
Choose one photo to supply the face and a second photo to supply the scene. In SwapThisFace, upload them under “Your face” and “Your new look,” review the processing notice, and select “Swap my face.” When processing finishes, inspect the comparison and download the result. Start with one visible face in each photo and similar head angles.
How can I put my face on another picture?
Use your selfie as the source and the picture you want to appear in as the target. For example, to place your face into a travel portrait, the travel portrait goes in the target slot. The target needs a visible face for this workflow; it is not a tool for placing a new person into an empty landscape. Choose another target if you need a different body pose or setting.
Can I swap a face in a photo for free without signing up?
SwapThisFace offers one successful guest photo swap without creating an account. It is a trial, not unlimited free face swapping. After that, continued use requires an available paid option. Check the current face swap pricing before buying; this guide does not promise free repeat attempts beyond the stated guest offer. Failed jobs release the reserved guest attempt or credit.
How do I swap faces in a photo without Photoshop?
Use a browser-based two-photo editor: upload the source portrait, upload the target, create the swap, and download. You do not need layers, manual selections, or Photoshop masking skills for this workflow. The tradeoff is less fine-grained control: if you need to hand-edit individual edges or make a complex composite, a photo-editing workflow with manual controls may suit that task better.
Can I swap faces on iPhone or Android without an app?
The editor runs in a browser, so an app installation or APK is not required. Choose your source and target using the upload controls and use Download when the result is ready. If a phone photo is HEIC, export a JPG, PNG, or WebP copy first. File-picker labels and save locations vary by device and browser; check the downloaded file before sharing it.
What photos work best for an AI face swap?
Start with sharp originals, one unobstructed face in each photo, similar head angles, and reasonably compatible lighting. A clear face matters more than an impressive overall image resolution. Avoid heavy filters, tiny faces, dark sunglasses, and hands covering the mouth. If the target uses a strong profile or unusual expression, choose a source that resembles that pose rather than a random front-facing selfie.
Why does my face swap look fake or blurry?
Common things to check are facial detail, head-angle mismatch, lighting differences, and objects crossing the face. Inspect the original inputs before trying again. Keep the target fixed and test a clearer source, or keep a good source and replace a difficult target. AI output varies, so some pairs may remain unsuitable even after several attempts.
Can I swap multiple faces in a group photo?
This version of SwapThisFace is a single-face photo workflow. It does not provide controls for assigning different source faces to several people in a group picture. Choose a single-person target for this guide. If you need a group swap, use a workflow that explicitly supports selecting and mapping each face rather than assuming a single-face editor will do it.
Will a face swap keep the original background and outfit?
The target establishes the composition, including the outfit and background, but you should inspect the output for unintended changes. Do not assume every surrounding pixel will remain identical. If your main goal is changing clothes or scenery, start with a target that already has the look you want; the photo face swap editor does not expose separate outfit or background editing controls.
Can I use a face swap photo as a professional headshot?
You can experiment with a suitable portrait target, but check whether the result accurately represents your appearance and is appropriate for where you plan to use it. Pay close attention to facial proportions, eyes, teeth, and skin texture. Do not treat an edited portrait as an identity document photo or assume that an employer, platform, or other recipient permits it. A new photograph may be the better choice when accurate representation is essential.
Which image formats can I upload for a face swap?
The editor accepts JPG, PNG, and WebP, with a maximum of 10 MB per image. Convert unsupported formats using an image export tool; changing the filename extension does not convert the image. If you need to reduce the file size, compare the exported copy with the original and make sure the face has not become visibly blurred or blocky.
Are my uploaded face photos stored permanently?
The published policy specifies expiration for uploaded originals and generated results; it does not describe them as permanent storage. Originals expire after 24 hours, guest results after 24 hours, and account results after 30 days. Download results you want to keep and read the current photo privacy and deletion policy for the full processing details before uploading sensitive images.
Does this tutorial also work for video or GIF face swaps?
No. This walkthrough is for still photos. It does not establish support for video clips, animated GIFs, or live camera effects. Those formats need workflows designed for motion and consistency across frames. For this editor, prepare two supported still images and assess the result as a single photograph.
Make your first photo face swap with a clear plan
Decide on the scene first, choose a source portrait that matches its angle, and check both faces before uploading. After the swap, compare the result carefully and change one input if something looks wrong. A considered photo pair and a specific quality check give you a more useful process than repeatedly submitting unrelated images.
Have your two photos ready? Put your face on another picture in the editor, then compare and download the result you want to keep.