A realistic face swap starts with a good photo pair.
Put your face into a different photo with SwapThisFace, then judge how well it fits. Compare the examples, check your inputs, and look closely at identity, lighting and facial edges.
Try a photo face swapOne successful guest swap to try. Results depend on your photos; free use is not unlimited.
Look at the original and the result
Move the slider and switch between three scenes. These are the examples already published on our homepage, not a controlled comparison with other tools. The source portrait is the same in each example.
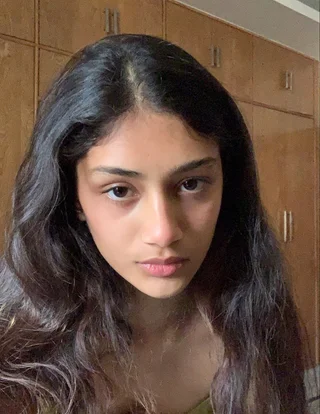
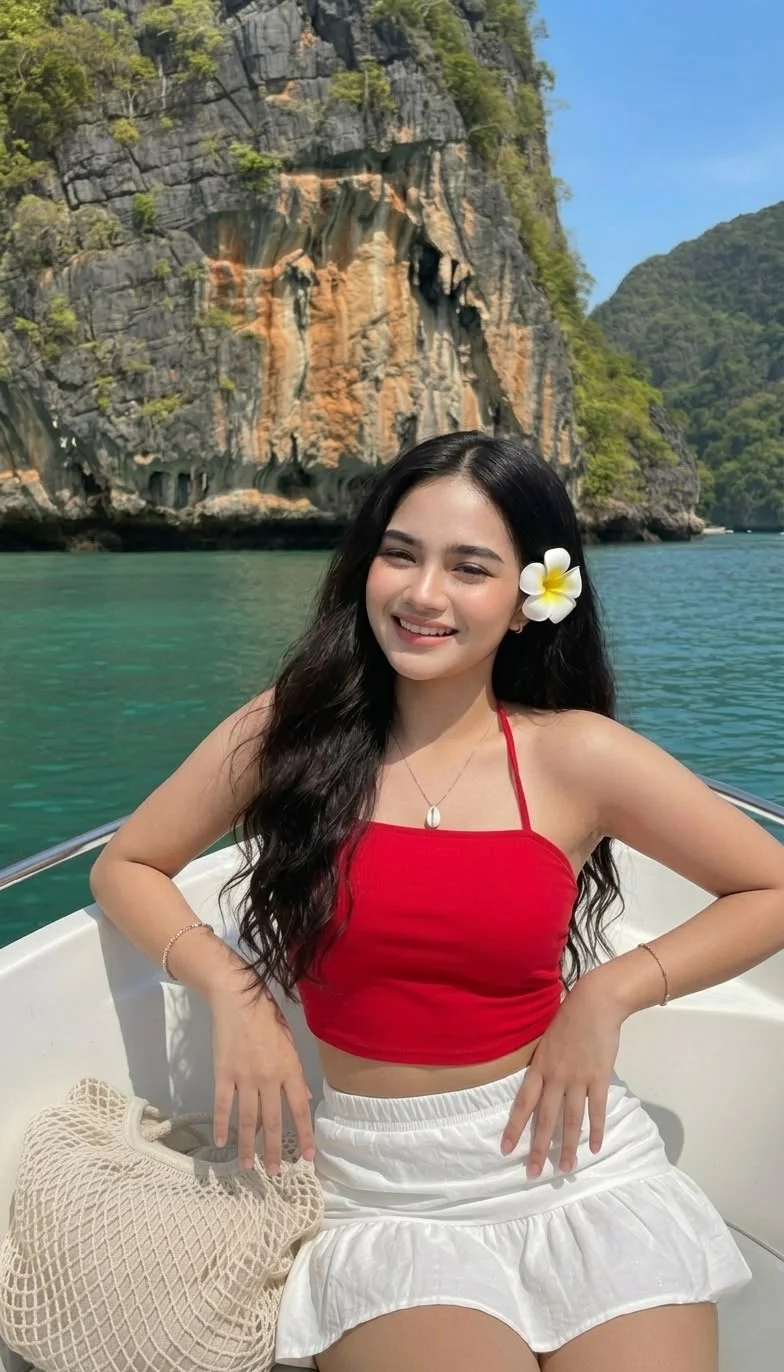
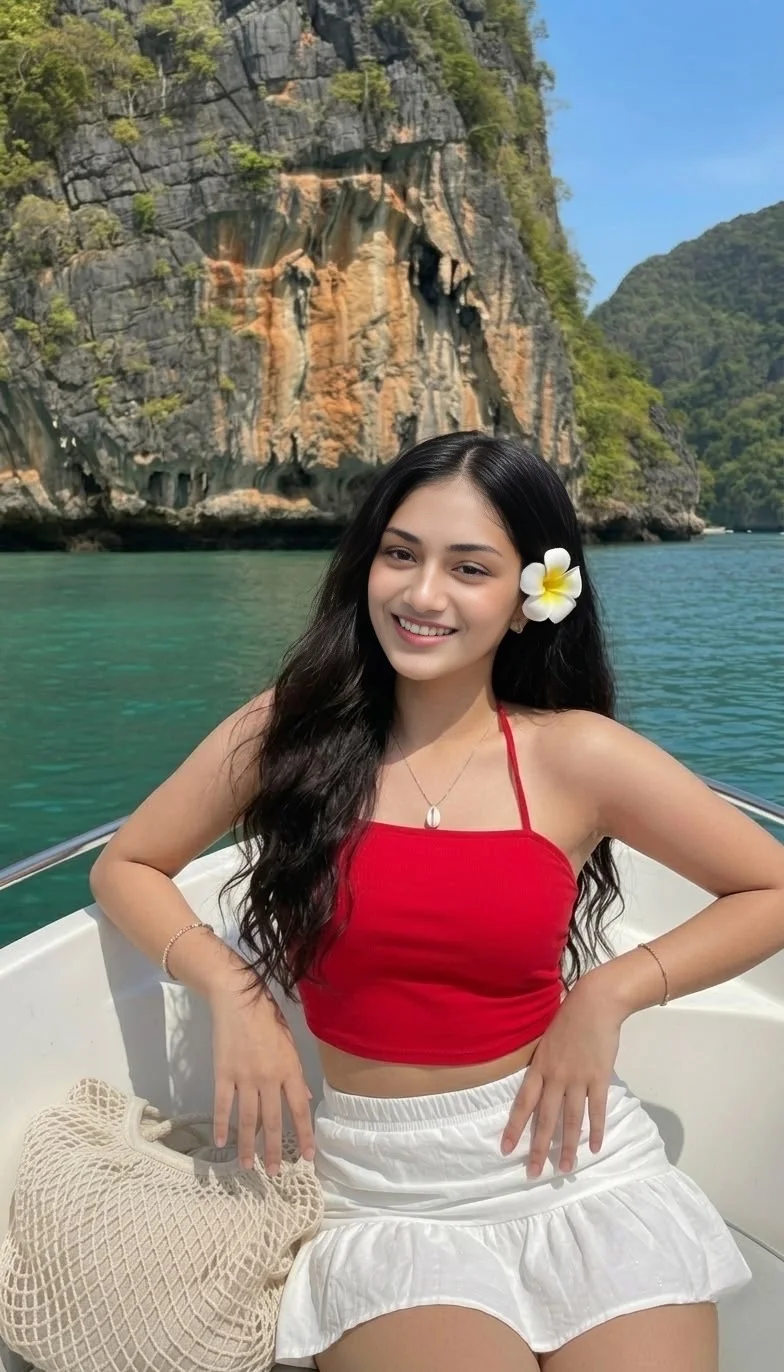
Slide to see the difference
Example face swaps · Results vary with your photos.
What makes a face swap look realistic?
A believable result needs more than a recognizable face. The face should fit the target’s head angle, expression, light and surrounding detail. An output can look convincing at thumbnail size while showing awkward eyes, mouth edges or skin transitions when enlarged.
SwapThisFace uses a source photo for the identity and a target photo for the scene. Choose the target for the pose, outfit and composition you want. This is a single-face photo workflow; there are no manual skin-tone, masking or lighting sliders.
Changing a photo is your practical way to change the starting conditions. Use the checklist to decide what to try before spending another attempt.
Check your photo pair before uploading
Use this self-check while looking at your two photos. It does not scan your images or predict a quality score.
What to check next
Choose a single-person target and a source portrait. Group face mapping is not supported by this editor.
Review five details before keeping a result
Identity
Compare the output with your source portrait. Check the relationship between the eyes, nose and mouth rather than looking only for a general resemblance. A recognizable face still needs to fit the target scene.
Head angle and expression
Look at the direction of the nose, eye line and chin. A front-facing source and a strongly turned target can be a difficult pair. If the mouth looks stretched, try a source with an expression closer to the target.
Light and skin transitions
Compare the face with the neck and ears. Look for a sudden color boundary or a bright face sitting in a dark scene. Try a less filtered source or a target with more compatible light.
Eyes, mouth and face edges
Inspect eyelids, teeth, cheek edges and the hairline at full size. Glasses, hair and hands near the face can make those boundaries harder to reconstruct. Do not judge solely from the editor’s small preview.
The rest of the photo
Compare the background, clothing and accessories against the original target. Review for unintended changes rather than assuming everything outside the face stayed identical.
If your face swap looks fake, change one input at a time
Keep the target fixed if the composition is right. Try a sharper source with a closer head angle and expression, then compare the new result against the previous one. This makes it easier to identify whether the source was the problem.
If several suitable sources struggle with the same target, change the target. A distant face, strong profile, heavy shadow or obstruction may be a poor fit for this workflow. Increasing the size of a blurry image does not restore the missing facial detail.
Keep the original inputs and note which change you made. There is no guarantee that another attempt will improve the result, and this page does not present the published examples as an average success rate.
Read the complete two-photo workflow and troubleshooting guideRealistic face swap questions
Does AI face swap actually work?
It can produce a recognizable face in a different target photo, as the published examples illustrate. Whether your result is convincing depends on the inputs and the processing model. Inspect the result before downloading or sharing it; a successful job does not guarantee a natural-looking face.
How can I make my face swap look more realistic?
Start with sharp, unobstructed faces and similar head angles. Match the expressions and lighting as closely as practical. Review the output at normal size and enlarged, then change one input at a time if you need to retry.
Is SwapThisFace the most realistic face swap tool?
We have not established that through a controlled comparison. Use the examples to judge the look, then try your own photo pair. A useful comparison between tools needs the same inputs, clear criteria and a record of unsuccessful results as well as successes.
Can I try a realistic face swap for free?
You can try one successful guest photo swap without creating an account. It is not unlimited free access. Review current plans and credit packs for continued use.
Can I create realistic group, video or live face swaps here?
The current editor accepts a source photo and a target photo with one visible face each. Group face mapping, video, GIF and live face swapping are not supported.
Does a high-resolution photo guarantee a better face swap?
No. The face itself needs to be sharp and visible. A large landscape with a tiny face may be less useful than a clear portrait. Use JPG, PNG or WebP files up to 10 MB each, and avoid enlarging a small image just to increase its dimensions.
Choose your two photos
Use a clear source portrait and a target you have permission to edit. Check the result against both originals, and make clear that the image is edited when its context could mislead someone.
Create your photo face swap